Deploy behind a gateway at Cloud66
I recently needed to move a Rails app from a public cloud hosted at Hetzner to a private cloud. We use Cloud66 for deployments and wanted to continue using this.
The app was relatively simple. It consisted of seven servers:
-
1 load balancer and gateway server
-
3 web servers
-
1 redis server
-
1 postreql db server
-
1 Meilisearch server
The rest of the guide assumes that you already have all these servers ready with fresh Ubuntu installs. I used Ubuntu 22.04, but it might work for other versions as well.
Register the gateway server
As only the gateway server will have a public IP, we need to start by registering this.
Open a browser to https://app.cloud66.com/registered_servers
SSH into the intended gateway server as root. Run the following script:
curl -s https://app.cloud66.com/server/7a0c406e2dbc3627ce8da72a01391e32/register_script.sh | bash -s
This makes the server call out to Cloud66 and register itself. It should show up under new servers.

Approve the server.
Define the server as a gateway
cx gateways add --name my-sweet-gateway --address 112.112.112.112 --username root --private-ip 10.01.01.01
--address is the public ip of your gateway server. The gateway server needs to work as both gateway and load balancer, so it must have a public ip.
--name is the name you want to call the gateway.
--username is the username you want Cloud66 to attempt to. It should be the same as in the previous step (typically root).
--private-ip is the IP of the gateway server in the private network behind the gateway.
Add this to the application’s .cloud66/manifest.yml:
production:
   	gateway:
   	    name: my-sweet-gateway
   	    username: root
If you are setting up the network in another environment than production, replace the production key.
This needs to be committed and pushed to the repository you are going to deploy from.
Open the gateway
Whenever you need to do anything behind the gateway (like deploy your app or add a new server), the gateway must be opened.
Create a ssh key pair on your local machine
ssh-keygen
Append the public key (the file you just generated, that ends in .pub) to the gateway server’s /home/root/.ssh/authorized_key file
Then open the gateway by running the following command:
cx gateways open --name my-sweet-gateway --key [PATH TO YOUR PRIVATE KEY] --ttl 1h
This set off SSH keys are now the keys to the kingdom. Make sure, that you store them somewhere safe and do not commit them anywhere.
Adding servers behind the gateway
If something in this section goes wrong and you need to remove a known host, run
ssh-keygen -R 112.112.112.112
-R is the ip you want removed from your known hosts
Open a local tunnel via ssh in a new terminal window
ssh root@112.112.112.112 -L 2222:10.01.01.02:22
-L means local tunnel
2222 is the local port that is being mapped
10.1.0.2:22 is the ip and port that is being mapped to
You can now open a new terminal and connect through the local tunnel with:
ssh root@localhost -p 2222
This might trigger the following error on your gateway server:
channel 3: open failed: administratively prohibited: open failed
To fix it you need to edit /etc/ssh/sshd_config to AllowTcpForwarding yes on your gateway server. This can be set to no or commented out. You then need to reload sshd:
systemctl reload sshd.service
And log out and back in before attempting to use the local tunnel again.
Run the registration script with an extra header for the server’s local ip. The header is important, as Cloud66 cannot communicate properly with the server, unless you give it the correct local ip.
curl -s https://app.cloud66.com/server/7a0c406e2dbc3627ce8da72a01391e32/register_script.sh --header X-Fixed-IP:10.1.0.2 | bash -s
Remember to approve the server on https://app.cloud66.com/registered_servers
Repeat for each server in the local network. If you get tired of editing your known_hosts file, you can connect with the following flag:
ssh root@localhost -o "StrictHostKeyChecking no" -p 2222
Deploying the application
Create a new application in Cloud66. In this example, I call the app my-sweet-app.
Remember to set all the required env vars (though the one for the Meillisearch url is not known until the custom Meillisearch server has been setup. You can leave it blank for now)
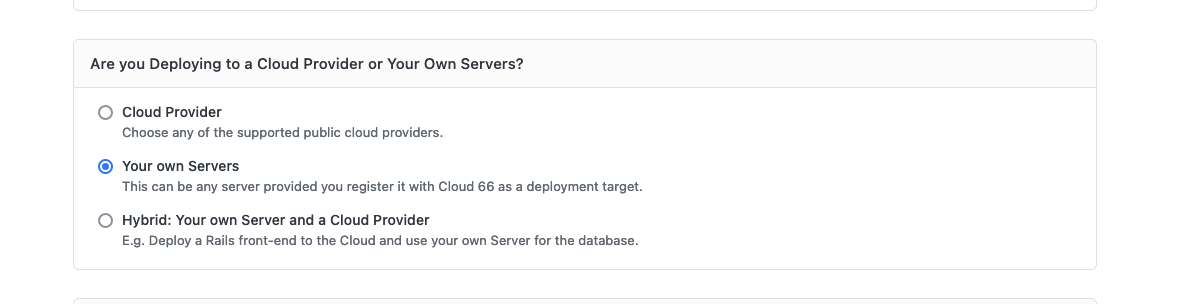
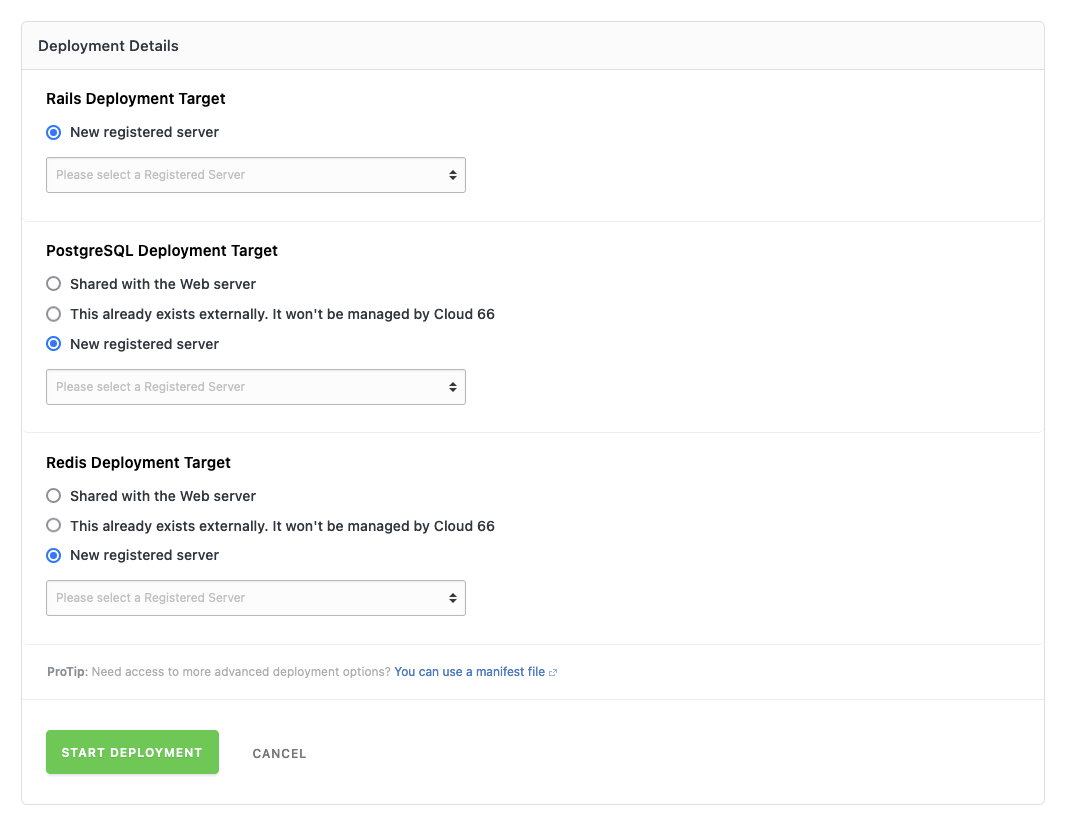
Add a web, redis and database server and let the deploy finish.
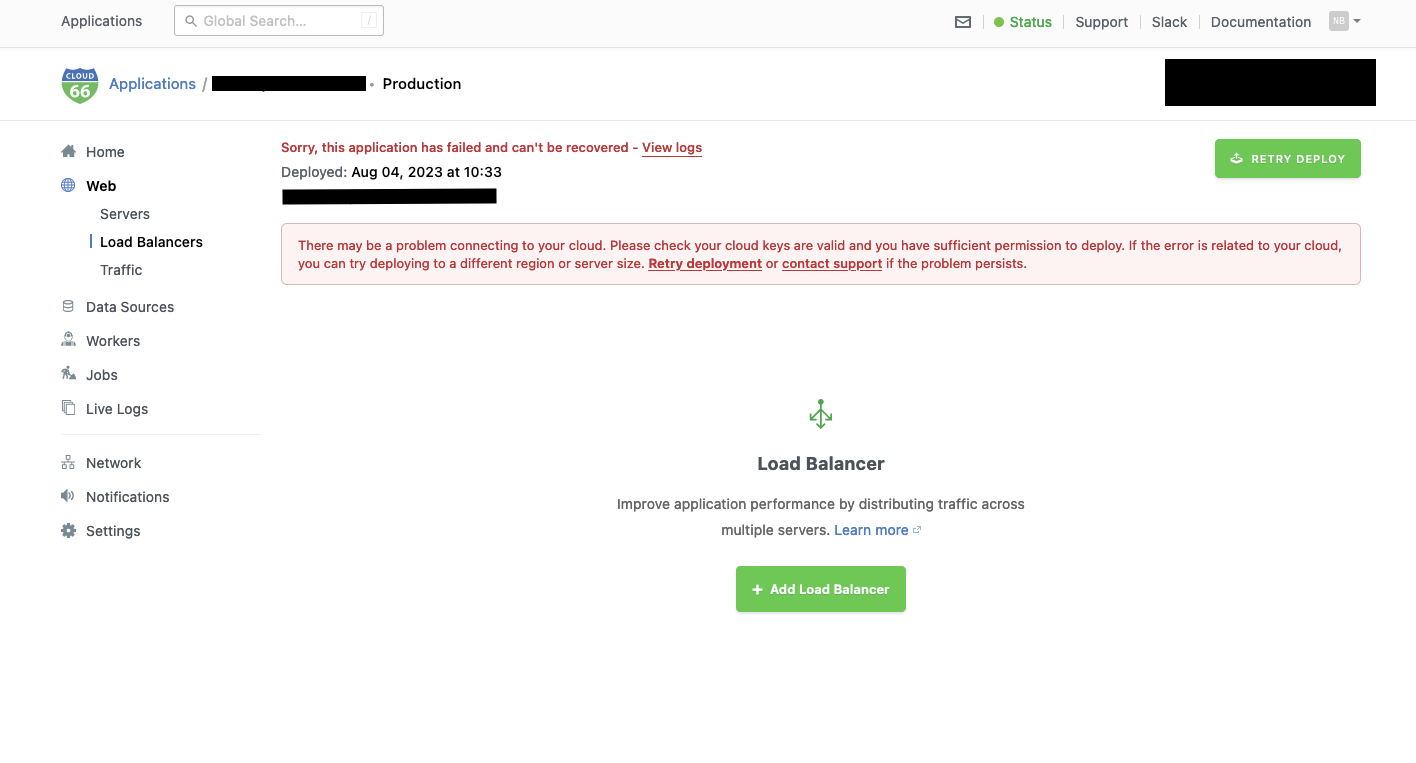
When the deploy is done, you are still not able to access the web server. Your gateway server needs to be set up as a load balancer. Go to the application’s page in Cloud66 and add a load balancer under Web in the sidebar. If the application fails to deploy, you probably need to start over again. You might even need to reset the servers, you have already added to Cloud66.
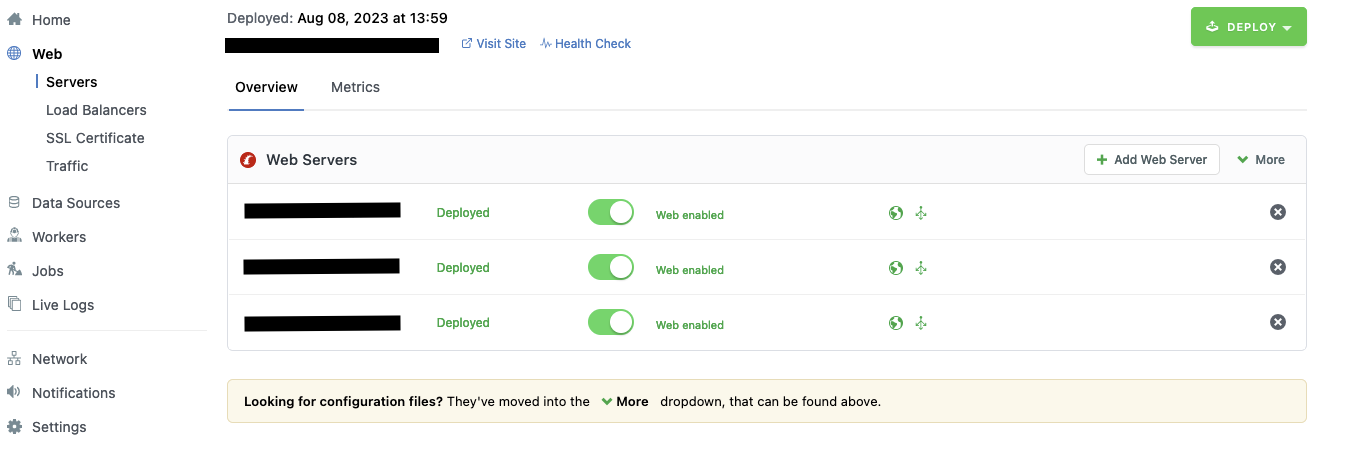
When the load balancer has been added, check that you can visit the app.
More web servers can now be added under Web in the sidebar.
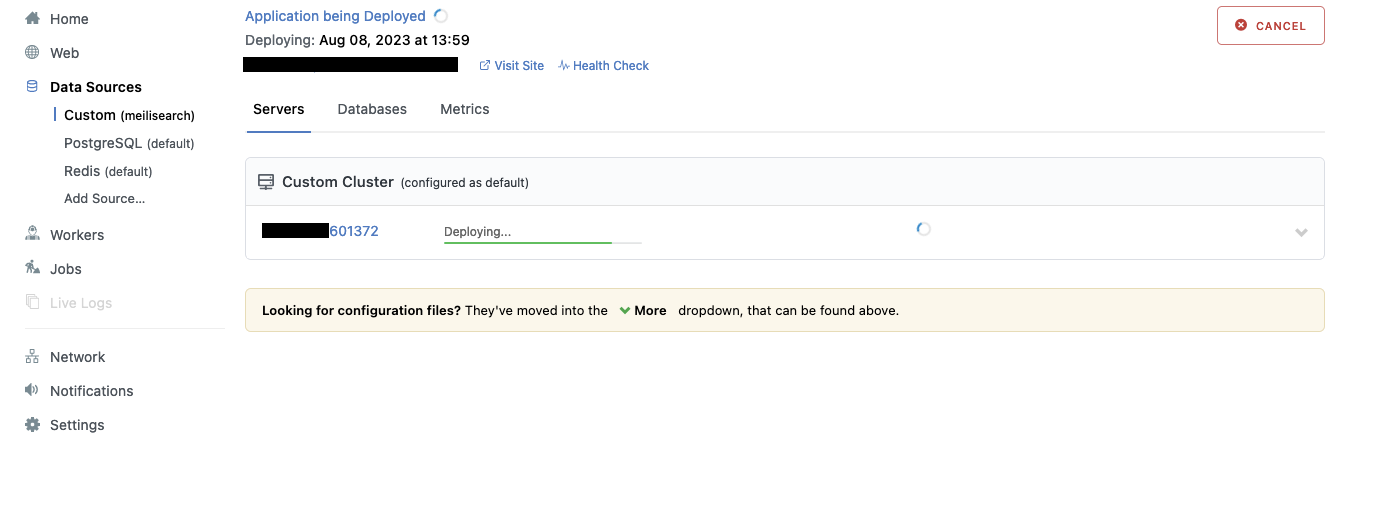
Custom Meilisearch server
Once these servers are up and running, we just need Meilisearch. It needs to be added as a Custom Server under Data Sources in the sidebar.

Connect to the Meilisearch server via ssh through Cloud66 toolbelt:
cx ssh -s my-sweet-app --gateway-key gateway custom
-s is the name of your stack/application
--gateway-key is the private key you generated previously
custom is one of the names Cloud66 uses for your custom server
If Cloud66 does not have your public ssh key, the command will fail and tell you to add it.
If you get a 255 error, check that the IP allowed through the firewall is actually your ip (.you can use minip.dk). When I did this it failed as my ip was ipv6. In that case, try going through a VPN.
If it still does not work, connect to the gateway server with the command above, then disconnect and retry connecting to your custom server.
Install meilisearch on your server by running:
curl -L https://install.meilisearch.com | sh
We need the server to automatically start Meilisearch, when booting. To do this we add two files. See https://linuxconfig.org/how-to-run-script-on-startup-on-ubuntu-22-04-jammy-jellyfish-server-desktop for more details.
The first is a Systemd service file, we store in /etc/systemd/system/meilisearch-boot.service
[Unit]
After=network.target

[Service]
ExecStart=/usr/local/bin/meilisearch-boot.sh

[Install]
WantedBy=default.target
The second is a script for the the Systemd file to call, stored in /usr/local/bin/meilisearch-boot.sh
#!/bin/bash

# Launch Meilisearch
/home/some-user/meilisearch --master-key="a-very-secret-code" --http-addr 0.0.0.0:7700
The path should point to where you installed meilisearch
--master-key is the master key you also supplied in your Cloud66 environment variables.
--http-addr is defined as 0.0.0.0:7700 so that any of your web servers can connect to it on port 7700.
These files need the correct permissions to be allowed to run:
sudo chmod 744 /usr/local/bin/meilisearch-boot.sh
sudo chmod 664 /etc/systemd/system/meilisearch-boot.service
The service unit needs to be enabled:
sudo systemctl daemon-reload
sudo systemctl enable meilisearch-boot.service
Now you can reboot your system.
sudo reboot
Once the server is up and running again, check if meilisearch is running.
If you cannot reconnect, make sure that the gateway is still open, then try to connect to the gateway server. Once connected to the gateway server, disconnect and retry the meilisearch server.
To check if the service is running correctly, run:
sudo lsof | grep meilisear
The output should include a line like this:
meilisear 2911 2915 actix-rt| root 15u IPv4 36985 0t0 TCP *:7700 (LISTEN)
The important bit is TCP *:7700 which means that it listens on port 7700.
Cloud66 has a firewall. You need to open access to the Meilisearch server’s port 7700. In my case it was not enough to select the custom server. I needed to select the specific one.
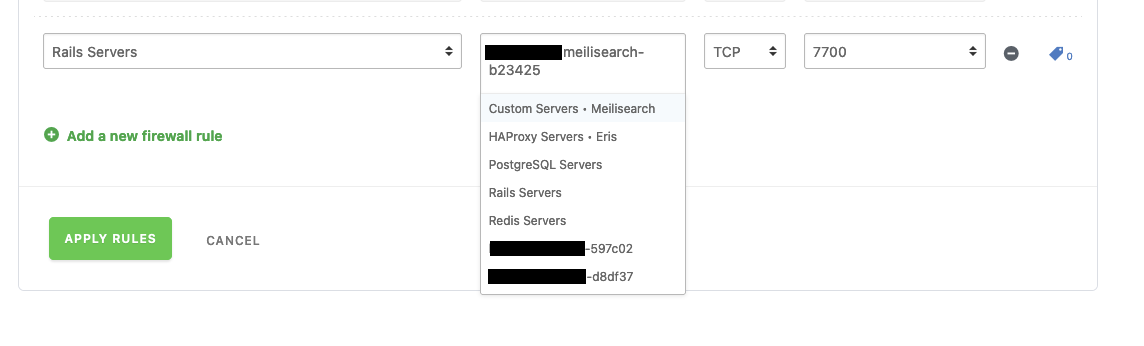
You probably need to update the env variable for MEILI_HTTP_ADDR to match your custom servers address. This address can be found by going to your custom server under Data Sources in the sidebar and clicking the server’s name

Redeploy your app and now you should be all set!